

거의 알고리즘 일기장
react - code splitting 본문
1. 코드 분할의 필요성
Create React App이나 Next.js, Gatsby 혹은 비슷한 툴을 사용하면 Webpack이 함께 설치되어 번들링 시 Webpack에 의해 자동으로 설정된 번들링이 된다.
번들링에 대한 자세한 내용은
https://humanwater.tistory.com/2
[webpack] 2) 번들링(Bundling) 개념 및 사용 이유
[이전 글] https://humanwater.tistory.com/1 [webpack] 1) 웹팩의 정의, 모듈(Module) https://github.com/webpack/webpack webpack/webpack A bundler for javascript and friends. Packs many modules into a f..
humanwater.tistory.com
이 링크를 참고하면 좋을것 같다.
아무튼 때문에 프로젝트가 너무 커졌을 경우에는 초기 로딩시간이 너무 길어져서 유저 경험이 나빠질수 있다.
어떻게 해야 초기 로딩속도를 빠르게 할수 있을까?
답은 간단하다. 그냥 번들을 나누어서 가져오면 된다. 이게 바로 코드 분할 ( code splitting ) 이다.
공식문서는 이렇게 설명되어 있다.
코드 분할은 여러분의 앱을 “지연 로딩” 하게 도와주고 앱 사용자에게 획기적인 성능 향상을 하게 합니다. 앱의 코드 양을 줄이지 않고도 사용자가 필요하지 않은 코드를 불러오지 않게 하며 앱의 초기화 로딩에 필요한 비용을 줄여줍니다.
2. 어떻게 사용하는가?
사용방법은 공식문서에 자세히 설명되어 있으므로, 내가 프로젝트에 어떻게 사용했는지만 설명하겠다.
나는 route를 기준으로 코드를 나누었고,
react에서 제공하는 React.lazy,Suspense 라는 함수를 이용했다.
코드 분할 전
//app.js
//...
function App() {
  return (
    <Router>
      <Switch>
        <LoginChecker>
          {routes.map((r) => (
            <Route
              key={r.path}
              path={r.path}
              component={r.component}
              strict
              exact={r.isExact}
            />
          ))}
        </LoginChecker>
      </Switch>
      <LoadingIndicator />
    </Router>
  );
}
//route.js
const routes = [
{
name: "influencer regist page",
path: "/influencer/black",
component: InfluencerBlackPage,
},
{
name: "influencer regist page",
path: "/influencer/candidate",
component: InfluencerCandidatePage,
},
//...
]
코드 분할 후
//app.js
//...
function App() {
  return (
    <Router>
      <Header />
      <Suspense fallback={<LoadingIndicator />}>
        <Switch>
          <LoginChecker>
            {routes.map((r) => (
              <Route
                key={r.path}
                path={r.path}
                component={r.component}
                strict
                exact={r.isExact}
              />
            ))}
          </LoginChecker>
        </Switch>
      </Suspense>
      <Footer />
    </Router>
  );
}
//route.js
import React from "react";
const IntroPage = React.lazy(() => import("pages/intro"));
const RegistSuccessPage = React.lazy(() => import("pages/registSuccess"));
//...
const routes = [
{
name: "influencer regist page",
path: "/influencer/black",
component: InfluencerBlackPage,
},
{
name: "influencer regist page",
path: "/influencer/candidate",
component: InfluencerCandidatePage,
},
//...
]

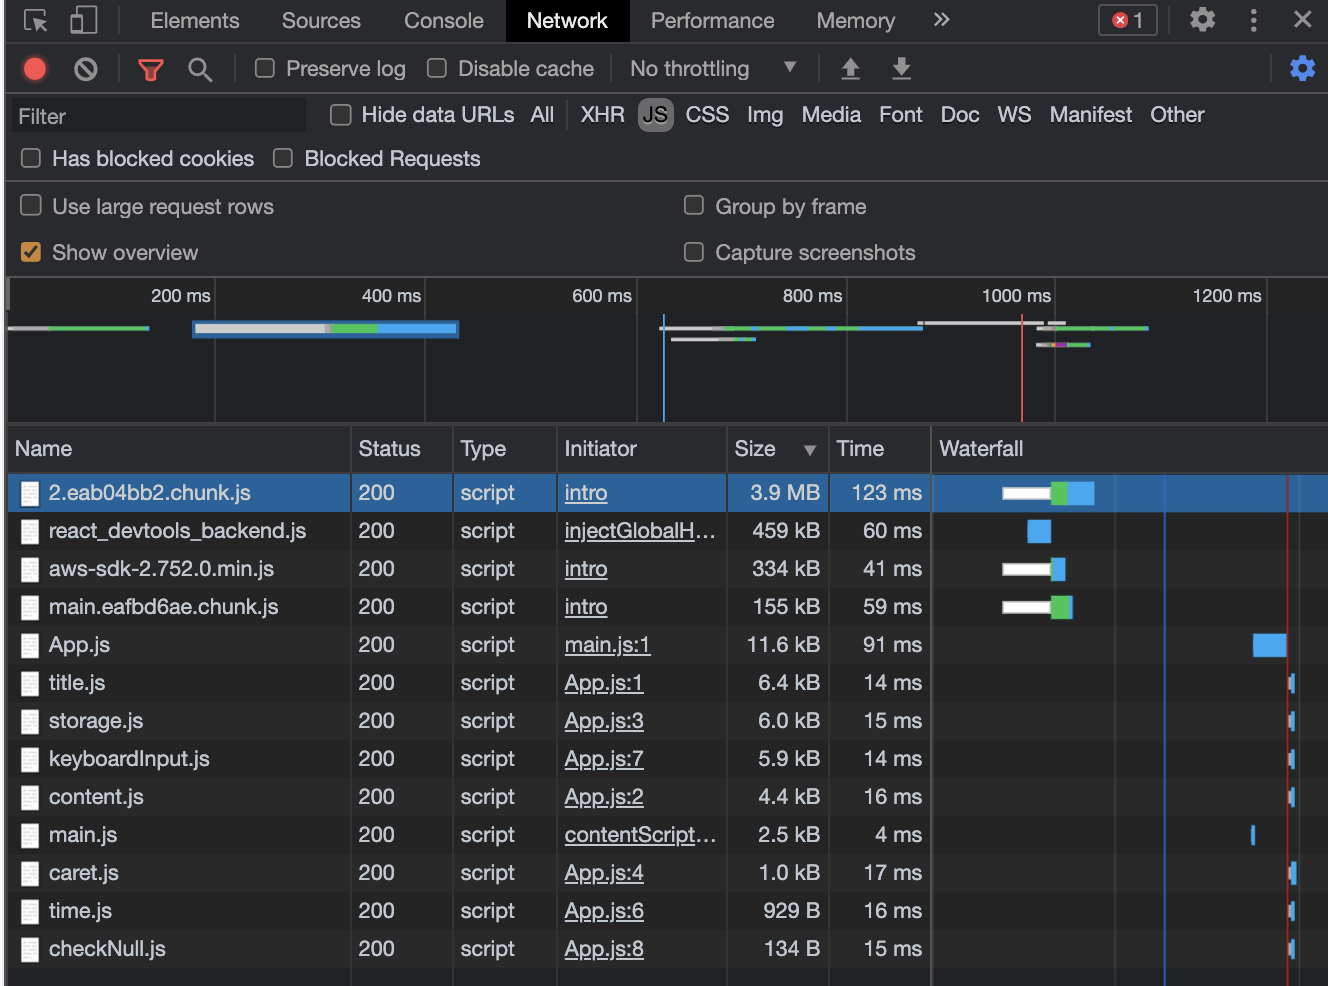
코드 분할 전에는 하나의 큰 덩어리였던 js파일을 받아오던게
코드 분할 후에는 쪼개서 가져옴을 확인하였다.
초기 로딩 속도도 빨라짐을 확인하였다.
3. 참고 자료
https://ko.reactjs.org/docs/code-splitting.html
코드 분할 – React
A JavaScript library for building user interfaces
ko.reactjs.org
4. 문제점
이 방식은 문제점이 하나 있는데 ssr 에서는 지원이 안된단다 ㅋㅋ
(추가 : React 18부터는 ssr에서도 지원)

하지만, ssr을 고려한다면 거의 next.js를 이용할 것이고,
next.js의 공식문서 맨 처음을 보면
To build a complete web application with React from scratch, there are many important details you need to consider:
- Code has to be bundled using a bundler like webpack and transformed using a compiler like Babel.
- You need to do production optimizations such as code splitting.
- You might want to statically pre-render some pages for performance and SEO. You might also want to use server-side rendering or client-side rendering.
- You might have to write some server-side code to connect your React app to your data store.
A framework can solve these problems. But such a framework must have the right level of abstraction — otherwise it won’t be very useful. It also needs to have great "Developer Experience", ensuring you and your team have an amazing experience while writing code.
next.js에서 지원하는듯 하다.
'web' 카테고리의 다른 글
| React 18 (Suspense를 이용한 ssr 아키텍처) 를 읽고 (0) | 2021.06.20 |
|---|---|
| git commit message convention (0) | 2021.06.13 |
| pc chrome 렌더링은 정상적으로 되는데, ios chrome에서 렌더링이 안될때 - (SyntaxError: Invalid regular expression: invalid group specifier name) (2) | 2021.06.12 |
| 브라우저 렌더링 과정 (0) | 2021.06.08 |
| jwt 로그인 방식 (2) | 2021.06.04 |


